Rails API with a frontend built in React, Part II.
May 28, 2019 - 12 min readMore on this series: Part I ⋮ Part III ⋮ Part IV
This is part two of my series and instead of continuing with the API I will start building the frontend, that is because doing the same sucks and I want to change the regular way of doing tutorials.
I’m not a guru in React so we will be using create-react-app because it is the easier way to set up everything and we will be setting up the other libraries to make our project works.
So lets get started, be sure that you’re using the latest version of node and you have npm as well updated to do this:
$ npx create-react-app movie-frontend
$ cd movie-frontend
With that set you should be able to run the server on http://localhost:3000/, I use yarn but you can use npm.
$ yarn run startRemoving unnecessary crap
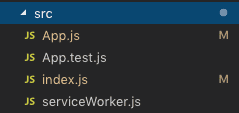
Now let’s remove some things we are not going to be using. In this case we’re going to delete all the css files and the logo.svg, located in src folder, and the references in the code as well. It should look like the image above
Now let’s update our App.js and our index.js
// App.js
import React from "react"

function App() {
  return (
    <div className="App">
      <h1>Movie App</h1>
    </div>
  )
}

export default App
// index.js
import React from "react"
import ReactDOM from "react-dom"
import App from "./App"
import * as serviceWorker from "./serviceWorker"
ReactDOM.render(<App />, document.getElementById("root"))
// If you want your app to work offline and load faster, you can change
// unregister() to register() below. Note this comes with some pitfalls.
// Learn more about service workers: https://bit.ly/CRA-PWA
serviceWorker.unregister()Notice that we just removed the css imports and the logo import, and modified our component to just display an h1 tag.
Adding a code formatter.
In this case we will use prettier which is an opinionated code formatter, to our project, that will give some consistency in our code.
$ yarn add --dev --exact prettierWith prettier added lets add a custom script to check all our files with prettier, lets modify our package.json
  "scripts": {
    //...rest of the scripts
    "format": "prettier --write src/**/*.{js,jsx}"
  },
Finally lets create a file to add a few rules to our code, I’ll be using gatsby starter blog ones, because I’m lazy
$ touch .prettierrcThe rules:
{
"endOfLine": "lf",
"semi": false,
"singleQuote": false,
"tabWidth": 2,
"trailingComma": "es5"
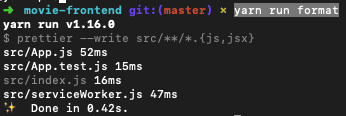
}That should let us use prettier in the cmd by running the following
$ yarn run formatWhich will give us an output like this
Styling our app
Our app looks very ugly right now, so let’s change a few things to make everything better.
As usual in frontend tutorial lets not break the way of doing those, We’ll be using boostrap. I like to use it as an npm package, because in that way I can override the variables using scss. So we need to add support for scss files.
$ yarn add node-sassNow let’s create a scss to style our app and import it to our App.js file.
$ mkdir src/styles
$ touch src/styles/main.scss
// App.js
import React from "react"
import "./styles/main.scss"
// Rest of the codeRestart your server and everything should be up and running without issues(just an ugly UI) which is not to be improved in this post.
Bootstrap is a frontend framework to create responsive a nice sites, it has built in components that let us style and create things very easy. While it is a great tool, it is not magic. Adding bootstrap is something fairly easy but I want to point some things first
- Bootstrap uses JQuery and Jquery is another javascript library and dependency that unlike react it manipulates the DOM directly, React uses something called virtual DOM and it performs better because it does not update the whole DOM. It is not recommended to combine it. See this article or this one for reference.
- With JQuery out of the scope we’re going to lost some bootstrap functionality, all the one that is done via JS(using JQuery), for example the modals.
- How are we going to use bootstrap without all the JS functionality? Well luckily there are a few libraries that are used to integrate bootstrap JS functionalities with React, one is React Bootstrap which is currently a beta version and Reacstrap.
- Those two libraries provide their components out of the box, like the NavBar, Modals, Dropdowns, Columns, Tables.
- Based on my experience I believe it is more flexible to avoid using the components only if you really need them(use a JS only functionality) because their core components are not as flexible to tweak.
- Using one of those two libraries, are kind of mandatory, unless you plan to re implement the whole bootstrap functionality again.
- With that being said, bootstrap is really cool, their grid system, their flex utilities, spacing utilities, makes everything so pleasant to work with.
Let’s add bootstrap
$ yarn add bootstrapNow we have to import bootstrap into our main.scss file we created
// main.scss
@import "~bootstrap/scss/bootstrap";
With our file imported in our scss file we’re able to use all the styling helpers bootstrap offers and now you can see if you restart your server that the typography in our project was changed to use the one bootstrap uses.
Using sass with bootstrap allows us to modify the variables that bootstrap uses, for example the most common one is the default colors, but you can modify a lot more than the colors, you can view what you can do here. We will create a globals file to add all our variables and override the bootstrap ones.
$ touch src/styles/_variables.scss// _variables.scss
$primary: #71eeb8;
$secondary: #ffa7c4;
$info: #64b5f6;
$danger: #d23669;
$warning: #ffcc99;
// Bootstrap overrides
$theme-colors: (
primary: $primary,
info: $info,
secondary: $secondary,
danger: $danger,
warning: $warning,
);To see our changes we need to import our new file into our main.scss file, it should be at the beginning also
@import "variables";

@import "~bootstrap/scss/bootstrap";
Now if we modify our h1 in App.js to this
function App() {
  return (
    <div className="App">
      <h1 className="text-primary">Movie App</h1>
    </div>
  )
}
We’ll see something like this:
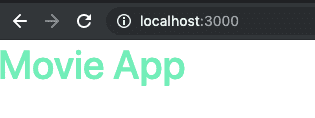
Notice how it changed from the bootstrap default blue to the primary color we defined in our _variables.scss file.
Redux for global state
We’re going to add redux to our application for having something to manage our global state.
$ yarn add redux react-redux redux-loggerWe’re adding redux and the integration for react, also there’s a library called redux-logger which logs when an action is triggered.
Now the way I learned redux was using this pattern, basically is having all your redux reducer things in one place. I like this because everything is contained in on module, instead of having to create different files. Now if you are used for the regular way to use redux, that’s fine, you can do it that way, there’s no difference.
Let’s create two folders:
$ mkdir src/redux
$ mkdir src/redux/modules
We will start building a dummy module, this will help to have a boilerplate ready project if you want to reuse it, also we’re going to add redux-actions which is a library that provides helpers to build our module(not strictly necessary but it helps a lot to write quickly).
$ touch src/redux/modules/dummy.js
$ yarn add redux-actions
In this file we’re adding everything regarding this module, the actions, the default reducer and the sagas(we’re not there yet).
// dummy.js
import { handleActions, createAction } from "redux-actions"

// Actions
export const DUMMY_ACTION = "movie-frontend/dummy/DUMMY_ACTION"

// Initial State
export const getInitialState = () => {
  return {
    dummy: null,
  }
}

// Reducer
const reducer = handleActions(
  {
    [DUMMY_ACTION]: (state, action) => {
      const { dummy } = action.payload
      return {
        ...state,
        dummy: dummy,
      }
    },
  },

  getInitialState()
)

export default reducer

// Action Creators
export const dummyAction = createAction(DUMMY_ACTION)
Now that we have our module ready we need to create the rootReducer, which is our global container for every module that we are going to create in our modules folder.
$ touch src/redux/rootReducer.js// rootReducer.js
import { combineReducers } from "redux"
import dummy from "./modules/dummy"
const rootReducer = combineReducers({
dummy,
})
export default rootReducerNow lets add redux-saga, this is a library that helps us manage our side effects. Side effects are function that modify things that are outside of the scope of the given function. It sounds complex at first but is one of the coolest libraries out there. With this tutorial you will have a clear idea of how they work, so keep reading the series and we will get to that part.
$ yarn add redux-sagaWith redux saga in our project, lets add a dummy saga to our dummy module.
// dummy.js
import { handleActions, createAction } from "redux-actions"
import { takeEvery, all } from "redux-saga/effects"

/* Rest of our code */

// Sagas
export function* createDummySaga(action) {
  // We'll have all the logic to call the side effect from here
}

// Saga
export function* dummySaga() {
  yield all([takeEvery(DUMMY_ACTION, createDummySaga)])
}
What we’re doing here is that the dummySaga function is watching for the action inside of it, so whenever DUMMY_ACTION is triggered in the code, that saga will execute the createDummySaga function, We can add as many sagas we want inside our dummy saga.
Let’s create our main container for our sagas.
$ touch src/redux/rootSaga.js// rootSaga.js
import { all } from "redux-saga/effects"
import { dummySaga } from "./modules/dummy"
export default function* rootSaga() {
yield all([dummySaga()])
}With all that being created, now we need to create our store and then wrap our app in a provider that is the one that is going to make our store available in the app.
$ touch src/redux/setupStore.jsimport { createStore, applyMiddleware } from "redux"
import { createLogger } from "redux-logger"
import createSagaMiddleware from "redux-saga"
import rootSaga from "./rootSaga"
import rootReducer from "./rootReducer"
export default function setupStore(initialState = {}) {
let middlewares = []
if (process.env.NODE_ENV === "development") {
const logger = createLogger({ collapsed: true })
middlewares.push(logger)
}
const sagaMiddleware = createSagaMiddleware()
middlewares.push(sagaMiddleware)
const store = createStore(
rootReducer,
initialState,
applyMiddleware(...middlewares)
)
sagaMiddleware.run(rootSaga)
return store
}This file is in charge of returning the store with the associated middlewares, notice how we inject the saga and if we’re on development we inject the logger as another middleware, that allows us to integrate the middleware functionality to our sagas.
import React from "react"
import { Provider } from "react-redux"import setupStore from "./redux/setupStore"
import "./styles/main.scss"

const store = setupStore()

function App() {
  return (
    <Provider store={store}>      <h1 className="text-primary">Movie App</h1>
    </Provider>  )
}

export default App
If done right the project should continue running without errors and you can check that everything is working if you add an extra line above the store declaration.
import React from "react"
import { Provider } from "react-redux"
import setupStore from "./redux/setupStore"
import "./styles/main.scss"

const store = setupStore()
console.log(store.getState())
/* Rest of the code*/
This should output all the reducers contained in our rootContainer with their default state.
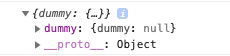
Pretty cool right?
Creating Env variables
This is very important to do, because there might be info we don’t want to have in our remote repo, for example the API url, so we will create a .env file to specify that.
$ touch .envREACT_APP_API_URL=http://localhost:3000/
This is a simple explanation but bear in mind it can be useful if you’re dealing with API keys or data that you want to hide from the others.
Installing Axios
This part is mostly to get everything running and finishing the set up, right now we need to install axios, because we need to set some requests for our API.
$ mkdir src/api
$ touch src/api/api.js
$ yarn add axios humps
As you can see we also added a library called humps, this is because there’s one concern when working with ruby and JS, normally you type your variables like this in ruby(using lowercases and underscores)
my_number = 0Meanwhile in JS(camelcase)
myNumber = 0That will bring us a big problem when we’re consuming the API because we would have to choose one standar for everything, which is absolutely not recommended. Humps is a library that help us to convert underscore to camelcase and viceversa, it was created for that purpose btw. So in order to do that conversion automatically we need to specify that in axios using our newly created api.js
import axios from "axios"
import humps from "humps"

const API = axios.create({
  baseURL: process.env.REACT_APP_API_URL,  transformResponse: [
    ...axios.defaults.transformResponse,
    data => humps.camelizeKeys(data),  ],
  transformRequest: [
    data => humps.decamelizeKeys(data),
    ...axios.defaults.transformRequest,  ],
})
Notice how we are using the environment variable here, to set our default endpoint and how we are using humps in the highlighted lines.
Wrapping up
If you manage to read everything or you want just a short summary of what we did, here it is, we create a React app, integrated, with redux and some middleware for it, sass, axios for making the request to our API and the usage of environment variables to hide sensitive data. I hope you find this useful and don’t forget subscribe and keep in touch for any sugerences and improvements
- ← Rails API with a frontend built in React, Part I.
- Rails API with a frontend built in React, Part III. →

Built and mantained by Jean Aguilar
Nobody likes you when you're twenty three