Building a Rails API for React, Part II: Setting Up React Frontend
May 28, 2019 · 4 min read
Update — April 4, 2026: This post has been updated to improve clarity and structure. Key changes include refined explanations of the Redux Ducks pattern, clearer instructions for Bootstrap theming, and updated code formatting for modern MDX standards.
This is part two of my series. Instead of continuing immediately with the API, I’m shifting focus to building the frontend. Tutorials can get repetitive if you stick to one side for too long, so let’s mix it up.
I’ll be using Create React App (CRA) as the foundation. It’s the most straightforward way to handle the initial build configuration so we can jump straight into the architecture.
1. Initial Setup and Cleanup
Ensure you are using the latest version of Node.js and npm before running the following:
$ npx create-react-app movie-frontend
$ cd movie-frontend
$ yarn start
Removing Boilerplate
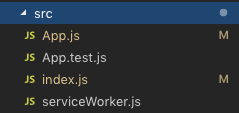
CRA comes with several files we won't need. Delete all CSS files and logo.svg from the src folder. Update your imports in App.js and index.js to remove references to these files.
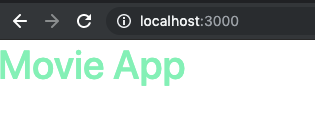
Your App.js should now be a clean slate:
// App.js
import React from "react"

function App() {
  return (
    <div className="App">
      <h1>Movie App</h1>
    </div>
  )
}

export default App
2. Enforcing Code Consistency with Prettier
To keep the codebase clean and consistent, especially when working in teams, we’ll use Prettier.
$ yarn add --dev --exact prettier
$ touch .prettierrc
Add a custom formatting script to your package.json:
"scripts": {
  "format": "prettier --write src/**/*.{js,jsx}"
}
Add these rules to your .prettierrc:
{
  "endOfLine": "lf",
  "semi": false,
  "singleQuote": false,
  "tabWidth": 2,
  "trailingComma": "es5"
}
Run yarn run format to automatically clean up your source files.

3. Styling with Bootstrap and Sass
We’ll use Bootstrap for our UI components. To customize it effectively, we need Sass support so we can override default variables.
$ yarn add node-sass bootstrap
Theming Strategy
Create a dedicated variables file to override Bootstrap's defaults:
$ mkdir src/styles
$ touch src/styles/_variables.scss
$ touch src/styles/main.scss
In _variables.scss, define your custom brand colors:
$primary: #71eeb8;
$secondary: #ffa7c4;

$theme-colors: (
  "primary": $primary,
  "secondary": $secondary
);
Then, import these into main.scss before the Bootstrap source:
@import "variables";
@import "~bootstrap/scss/bootstrap";
Note on jQuery: Traditional Bootstrap relies on jQuery for JavaScript components (modals, dropdowns). Since jQuery manipulates the DOM directly, it conflicts with React's Virtual DOM. Use libraries like Reactstrap or React Bootstrap for these interactive elements instead.
4. Global State Management with Redux
We’ll implement the Ducks pattern, which keeps actions, reducers, and constants in a single modular file.
$ yarn add redux react-redux redux-logger redux-actions redux-saga
The Modular "Duck" Structure
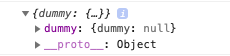
Create a dummy module to test the implementation:
// src/redux/modules/dummy.js
import { handleActions, createAction } from "redux-actions"

export const DUMMY_ACTION = "movie-frontend/dummy/DUMMY_ACTION"

const reducer = handleActions({
  [DUMMY_ACTION]: (state, action) => ({
    ...state,
    dummy: action.payload.dummy,
  })
}, { dummy: null })

export default reducer
export const dummyAction = createAction(DUMMY_ACTION)
Side Effects with Redux-Saga
Sagas allow us to manage complex side effects (like API calls) using generator functions.
// rootSaga.js
import { all } from "redux-saga/effects"
import { dummySaga } from "./modules/dummy"

export default function* rootSaga() {
  yield all([dummySaga()])
}
Store Configuration
The setupStore.js file initializes the store with middleware like redux-logger (for development) and redux-saga.
// setupStore.js snippets
const sagaMiddleware = createSagaMiddleware()
const store = createStore(rootReducer, initialState, applyMiddleware(sagaMiddleware, logger))
sagaMiddleware.run(rootSaga)
5. Connecting to the API with Axios and Humps
A major hurdle when connecting Rails to React is the naming convention difference: Ruby uses snake_case, while JavaScript uses camelCase.
We use the Humps library with Axios to automate this conversion:
$ yarn add axios humps
// src/api/api.js
const API = axios.create({
  baseURL: process.env.REACT_APP_API_URL,
  transformResponse: [
    ...axios.defaults.transformResponse,
    data => humps.camelizeKeys(data),
  ],
  transformRequest: [
    data => humps.decamelizeKeys(data),
    ...axios.defaults.transformRequest,
  ],
})
Wrapping Up
We now have a professional-grade React foundation including:
- Modular State: Redux with the Ducks pattern.
- Asynchronous Flow: Redux-Saga for side effects.
- Custom Styling: Sass-integrated Bootstrap.
- Data Integrity: Automated key conversion for Rails compatibility.
In the next part, we'll dive back into the Rails API to build the core Movie resources.